Satochip, Uniblow and Wallet Connect, your secure gateway to the Web3
Uniblow and Satochip hardware wallet - Your safety gateway to the Web3

How to use your hardware wallet to safely interract with the Web3, dApps and DeFi?

Prerequisites

We assume that if you’re reading this page, you already own a Satochip card and associated card reader. If you don’t, you can buy them in our online store ๐Ÿ”—.

The first step is to visit the Uniblow website to download๐Ÿ”— the software compatible with your operating system. Uniblow runs on Windows, MacOS and Linux, so you’ll find something to suit you whatever system you’re using.

Once youโ€™ve dowloaded Uniblow, connect your card reader to your computer and insert your Satochip. Then, launch Uniblow.

Launch Uniblow and setup your Satochip

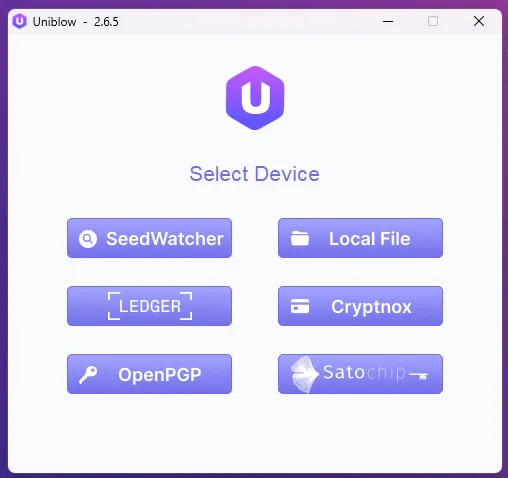
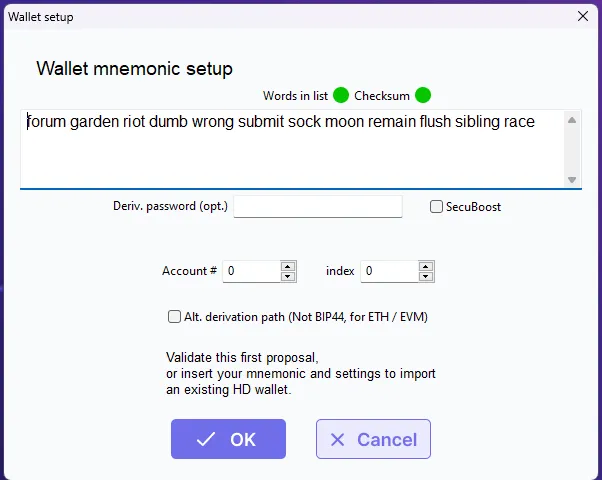
Once the Uniblow application has been launched, you will be asked to select the account you wish to access. Here, you can select “Satochip”. If you have not yet initialized your Satochip card, you will have to :

1/Import your seedphrase or generate a new one via Uniblow

It’s crucial to store your seedphrase properly. If you’re in any doubt about how to do it, read this article ๐Ÿ”— from the Satochip academy. You can also choose to strengthen your security by getting a Seedkeeper ๐Ÿ”—, which we’ve designed specifically to help you keep your secrets safe.

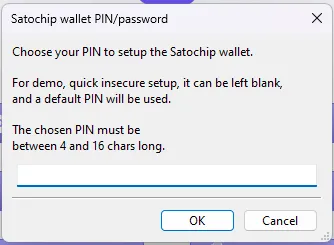
2/ Choose your personal PIN code

Like the seedphrase, the PIN code must be chosen wisely and known only by you. Anyone with knowledge of your PIN and physical access to your Satochip could spend your funds. Here again, you can choose to save your PIN code in a Seedkeeper for an extra layer of security.

Security tip: avoid any reference to personal and/or public data (such as your date of birth, for example) and choose the strongest possible PIN code (16 characters maximum).
Uniblow and Satochip hardware wallet - Your safety gateway to the Web3

Access the ETH and EVM network (L2)

Once the PIN code has been entered, Uniblow opens its doors, and with it, those of Defi.

First, you’ll need to familiarize yourself with the EVM (Ethereum Virtual Machine) ecosystem. This includes all blockchains compatible with the Ethereum Virtual Machine. This means you can use the same address on the Ethereum core network as on other blockchains, such as the Binance Smart Chain (BSC), Polygon (MATIC) or Avalanche (AVAX).

Using Uniblow with your Satochip hardware wallet will also gives you acces to: the Base network (BASE), Optimism (OP), Fantom (FTM), Metis (METIS), Moonbeam (GLMR) or even Arbitrum (ARB).

Send, receive and manage your Satochip account

To receive funds from your EVM address, simply share it with others: Uniblow lets you copy your EVM address or present it as a QR code for easy sharing.
You can also easily access your transaction history via a block explorer. Using this type of tool is fairly straightforward, but we’ll come back to it in a dedicated article to answer any questions you may have!

As you can see, Uniblow is compatible with Wallet Connect ๐Ÿ”—, so you can use Uniblow to navigate into the Web3 while using a secure Satochip ๐Ÿ”—hardware wallet.

ย 

Cautionย :
The use of a hardware wallet๐Ÿ”—implies that your intervention is required to sign any transaction. But this does not protect you from fraudulent transactions if you sign them! So always be extremely careful about the authorizations you give and the transactions you sign.

The world of DeFi is fascinating, but it’s full of pitfalls that stand in the way of every users. Don’t put your trust in projects that are too new, or in unknown developers, or in promises of returns on your capital that are too good to be true.

Uniblow and Satochip hardware wallet - Your safety gateway to the Web3

How to connect your Satochip to a dApp?

Now that you are setup, let’s use Uniblow ๐Ÿ”— to connect to Uniswap, one of the best-known decentralized finance protocols. In order to do so, letโ€™s go on the official Uniswap ๐Ÿ”— protocol website.

Choose the logo of the blockchain you wish to use (here Ethereum) and click on โ€œConnectโ€. Then, choose ยซ WalletConnect ยป.

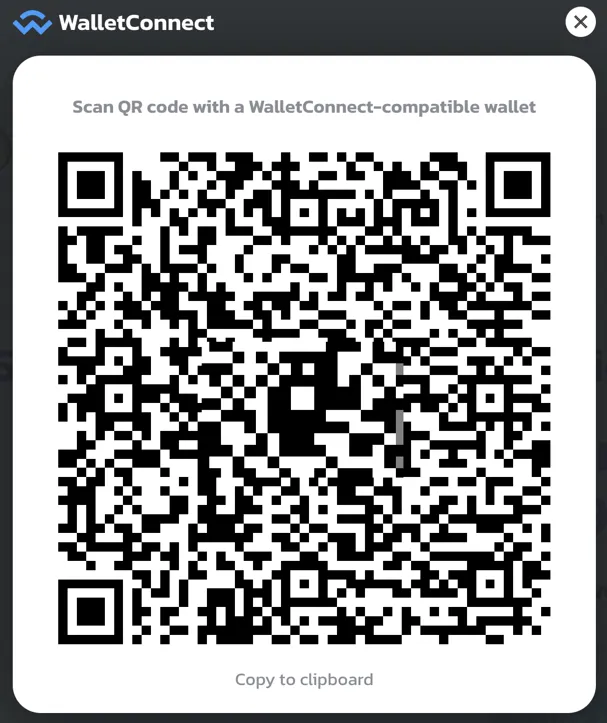
To connect Uniblow (and your Satochip wallet) to Uniswap, you need to copy the wallet connect URL by clicking on the copy button in the top right-hand corner of the window that appears.

Uniblow and Satochip hardware wallet - Your safety gateway to the Web3

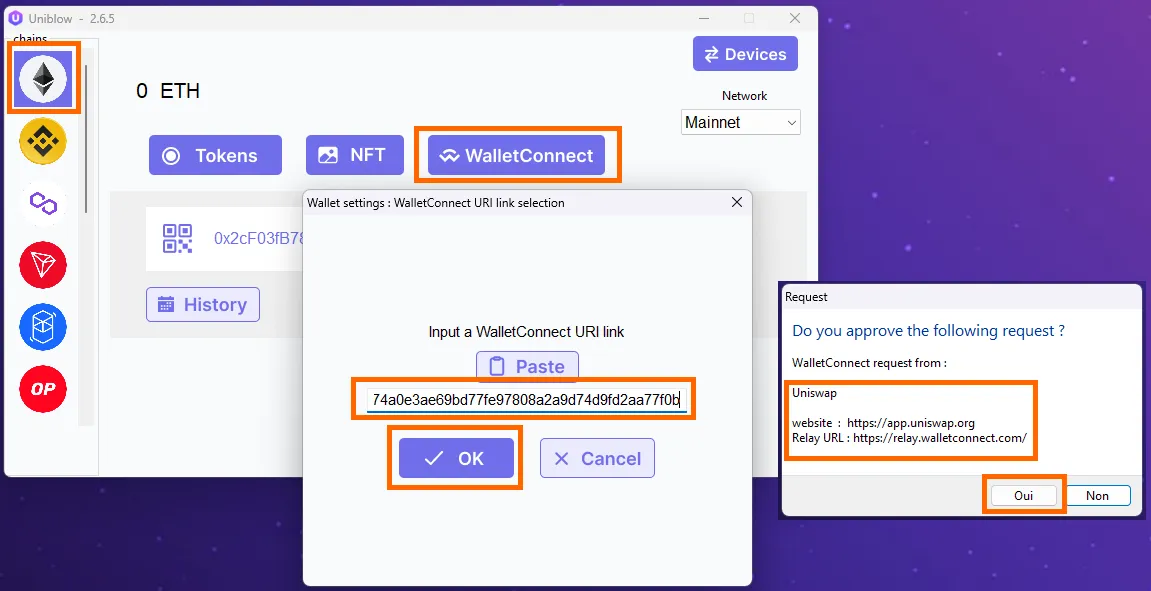
Then click on โ€œWallet Connectโ€ on Uniblow and paste the URL. You will be asked to approve the connection.

Click on Yes, taking care to check the URL of the site to which you are connecting (here https://app.uniswap.org) is the URL of the official Uniswap application.

Thatโ€™s it, youโ€™re connected ! Easy,right!?

Uniblow and Satochip hardware wallet - Your safety gateway to the Web3

Conclusion

You can now use Uniswap to exchange various ERC-20 tokens. The procedure is exactly the same if you want to use the Polygon blockchain or any other EVM network via Uniswap. But you can also use Uniblow and the Wallet Connect protocol to connect your Satochip hardware wallet to:
Rabby Wallet ๐Ÿ”—
Blur.io, the NFT marketplace ๐Ÿ”—
Aave, the leading liquidity and lending protocol ๐Ÿ”—
– …

By following this guide, you’ll be able to use DeFi with Uniblow, the Wallet Connect protocol and your Satochip ๐Ÿ”—hardware wallet.

Satochip, Uniblow and Wallet Connect, your secure gateway to the Web3

Uniblow and Satochip hardware wallet - Your safety gateway to the Web3

How to use your hardware wallet to safely interract with the Web3, dApps and DeFi?

Prerequisites

We assume that if you’re reading this page, you already own a Satochip card and associated card reader. If you don’t, you can buy them in our online store ๐Ÿ”—.

The first step is to visit the Uniblow website to download๐Ÿ”— the software compatible with your operating system. Uniblow runs on Windows, MacOS and Linux, so you’ll find something to suit you whatever system you’re using.

Once youโ€™ve dowloaded Uniblow, connect your card reader to your computer and insert your Satochip. Then, launch Uniblow.

Launch Uniblow and setup your Satochip

Once the Uniblow application has been launched, you will be asked to select the account you wish to access. Here, you can select “Satochip”. If you have not yet initialized your Satochip card, you will have to :

1/Import your seedphrase or generate a new one via Uniblow

It’s crucial to store your seedphrase properly. If you’re in any doubt about how to do it, read this article ๐Ÿ”— from the Satochip academy. You can also choose to strengthen your security by getting a Seedkeeper ๐Ÿ”—, which we’ve designed specifically to help you keep your secrets safe.

2/ Choose your personal PIN code

Like the seedphrase, the PIN code must be chosen wisely and known only by you. Anyone with knowledge of your PIN and physical access to your Satochip could spend your funds. Here again, you can choose to save your PIN code in a Seedkeeper for an extra layer of security.

Security tip: avoid any reference to personal and/or public data (such as your date of birth, for example) and choose the strongest possible PIN code (16 characters maximum).
Uniblow and Satochip hardware wallet - Your safety gateway to the Web3

Access the ETH and EVM network (L2)

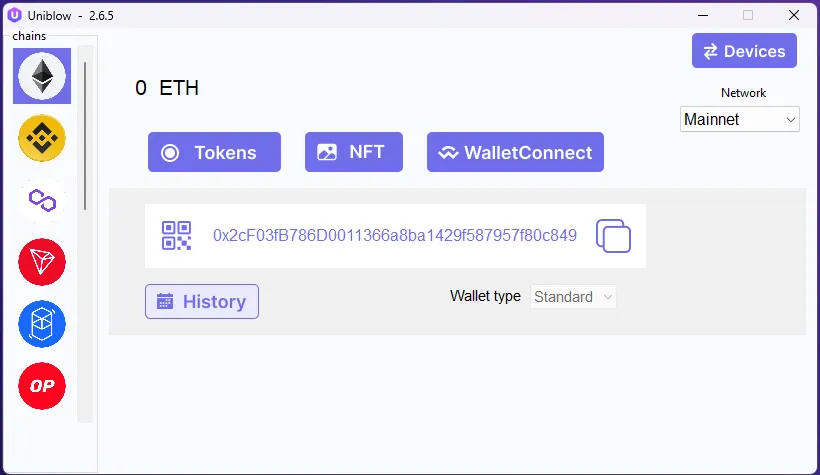
Once the PIN code has been entered, Uniblow opens its doors, and with it, those of Defi.

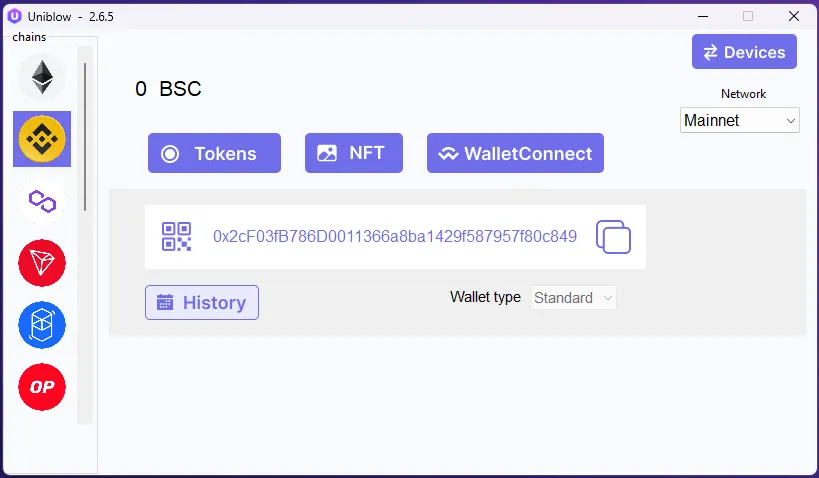
First, you’ll need to familiarize yourself with the EVM (Ethereum Virtual Machine) ecosystem. This includes all blockchains compatible with the Ethereum Virtual Machine. This means you can use the same address on the Ethereum core network as on other blockchains, such as the Binance Smart Chain (BSC), Polygon (MATIC) or Avalanche (AVAX).

Using Uniblow with your Satochip hardware wallet will also gives you acces to: the Base network (BASE), Optimism (OP), Fantom (FTM), Metis (METIS), Moonbeam (GLMR) or even Arbitrum (ARB).

Send, receive and manage your Satochip account

To receive funds from your EVM address, simply share it with others: Uniblow lets you copy your EVM address or present it as a QR code for easy sharing.
You can also easily access your transaction history via a block explorer. Using this type of tool is fairly straightforward, but we’ll come back to it in a dedicated article to answer any questions you may have!

As you can see, Uniblow is compatible with Wallet Connect ๐Ÿ”—, so you can use Uniblow to navigate into the Web3 while using a secure Satochip ๐Ÿ”—hardware wallet.

ย 

Cautionย :
The use of a hardware wallet๐Ÿ”—implies that your intervention is required to sign any transaction. But this does not protect you from fraudulent transactions if you sign them! So always be extremely careful about the authorizations you give and the transactions you sign.

The world of DeFi is fascinating, but it’s full of pitfalls that stand in the way of every users. Don’t put your trust in projects that are too new, or in unknown developers, or in promises of returns on your capital that are too good to be true.
Uniblow and Satochip hardware wallet - Your safety gateway to the Web3

How to connect your Satochip to a dApp?

Now that you are setup, let’s use Uniblow ๐Ÿ”— to connect to Uniswap, one of the best-known decentralized finance protocols. In order to do so, letโ€™s go on the official Uniswap ๐Ÿ”— protocol website.

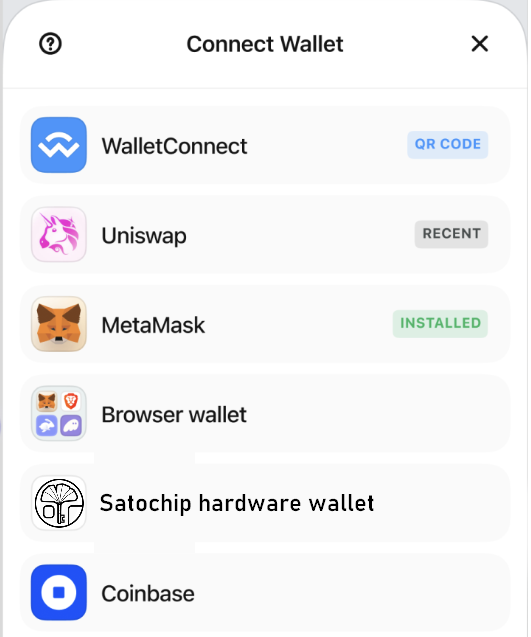
Choose the logo of the blockchain you wish to use (here Ethereum) and click on โ€œConnectโ€. Then, choose ยซ WalletConnect ยป.

To connect Uniblow (and your Satochip wallet) to Uniswap, you need to copy the wallet connect URL by clicking on the copy button in the top right-hand corner of the window that appears.
Uniblow and Satochip hardware wallet - Your safety gateway to the Web3

Then click on โ€œWallet Connectโ€ on Uniblow and paste the URL. You will be asked to approve the connection.

Click on Yes, taking care to check the URL of the site to which you are connecting (here https://app.uniswap.org) is the URL of the official Uniswap application.

Thatโ€™s it, youโ€™re connected ! Easy,right!?

Uniblow and Satochip hardware wallet - Your safety gateway to the Web3

Conclusion

You can now use Uniswap to exchange various ERC-20 tokens. The procedure is exactly the same if you want to use the Polygon blockchain or any other EVM network via Uniswap. But you can also use Uniblow and the Wallet Connect protocol to connect your Satochip hardware wallet to:
Rabby Wallet ๐Ÿ”—
Blur.io, the NFT marketplace ๐Ÿ”—
Aave, the leading liquidity and lending protocol ๐Ÿ”—
– …

By following this guide, you’ll be able to use DeFi with Uniblow, the Wallet Connect protocol and your Satochip ๐Ÿ”—hardware wallet.